Thursday 30 June 2011

Winnie the Pooh Wisdom & Quotes

I was searching the Etsy website and found some art with Winnie the Pooh quotes on them.  Growing up I always loved Winnie the Pooh and remember watching all the movies and having my own Pooh bear.  Back then I really didn't understand or listen to the meaning of some of these wonderful words of wisdom.  Some of these would be great in a child's bedroom or a nursery.  Here are just a few.....

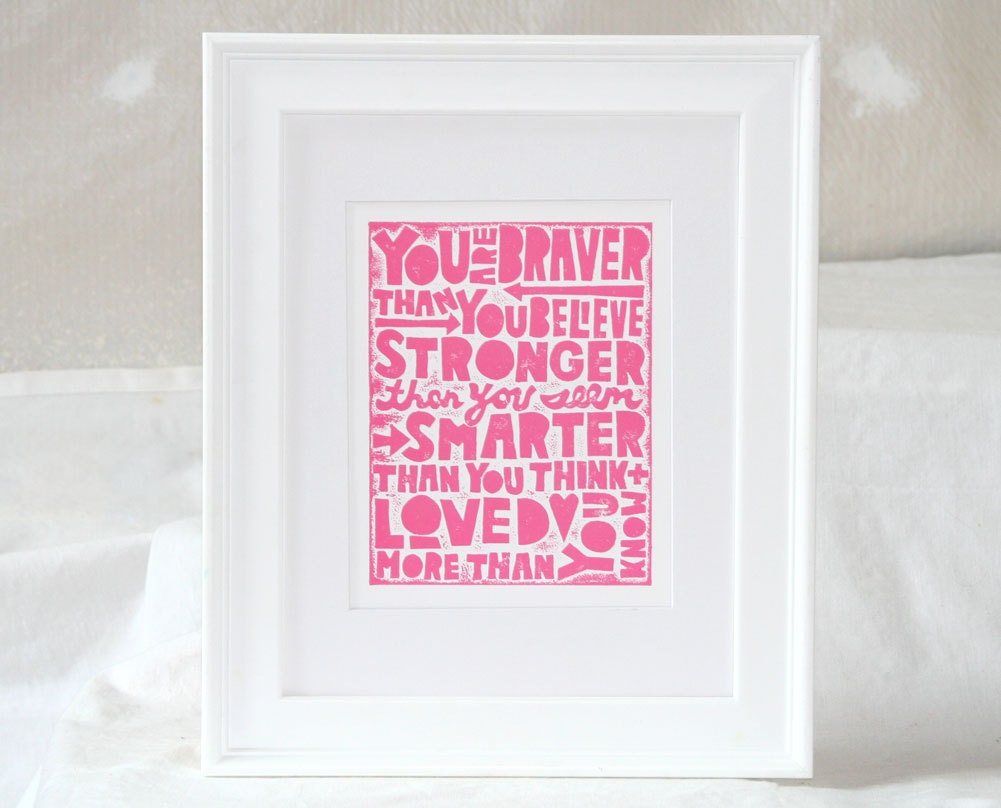
Winnie the Pooh Quote You Are Braver than You Believe


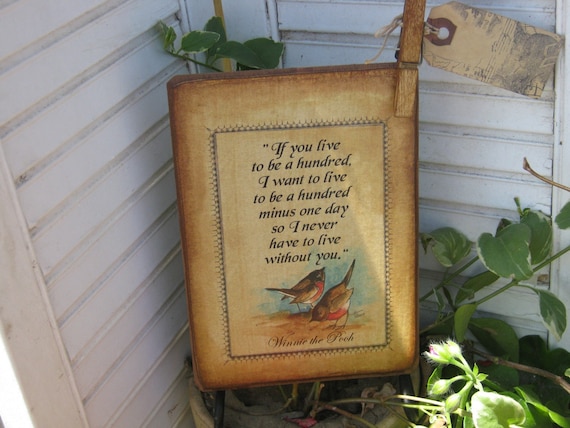
Two Robins


Sometimes the Smallest Things- 11x14 Print


In Your Heart Forever


Winnie the Pooh I think it's called Love Quote A4 Print


Have a great long weekend everyone!
Kim

Tuesday 28 June 2011

Recipe - Kim's Chicken & Sundried Tomato Pasta

Remember when Joey Tomatoes had a dish called the Michelangelo?  Well, it was one of my favorites, and it's no longer on the menu.  I had a craving for it one day and decided to make up my own version of it.  I have shared it with a few of my friends and they loved it, so I thought I would share it with all of you. 

Hope you like it! 

This makes enough for 2 people with a little bit left for lunch the next day. 

Ingredients

1 large or 2 small chicken breasts cut into bite size pieces
1 Tbsp flour
1 tsp basil (use more to taste if using fresh basil)
1/2 tsp salt
1/4 tsp ground pepper
1 tsp olive oil
4 green onions, sliced
2-4 garlic cloves, minced
1/2 cup white wine
1/4 cup chicken broth
3/4 cup green peas (fresh or frozen)
1/2 cup sun dried tomatoes (oil packed) ( I dab some of the oil off with a paper towel)
Freshly grated Parmesan cheese
2 cups dried Fusilli pasta

Method

Mix flour, basil, salt, and pepper together.  Add chicken and toss to coat.  (I use a baggie to make it easier).  Add olive to skillet and cook green onion for about 2 minutes, then add the garlic and cook for another minute.  Add chicken and cook until it is lightly browned.  Add the white wine to the pan, stir and reduce for about 2 minutes. Stir in the sun dried tomatoes, chicken broth, and peas.  Cook until the peas are warmed.  Toss with cooked pasta and top with fresh Parmesan.  Quick, easy and delicious!
Friday 24 June 2011

Beautiful Kitchen Inspiration

I was out walking with my girlfriend the other day and we were talking about our favorite designers.  One of our favorites was definitely Brian Gluckstein.  I have a number of photos of spaces Brian has designed in my inspiration folder. Going through them, I found these pictures of a kitchen he did for a couple in Toronto and intend to use it as inspiration for my own kitchen.  It's warm & welcoming, traditional but not too fussy, and has a classic look and feel that will never go out of style. 


I really like the range hood, apparently the cap is acid-washed zinc. 


A closer look.....


Beautiful limestone countertops.

To read the article and get more detail, click here Amazon.com 

Well, that's it for today.  Time to head outside and enjoy the beautiful sunshine before the clouds roll in..  Have a great weekend! 


Thursday 23 June 2011

Building our Bungalow - Exterior Colors

Who knew that choosing exterior colors for your home would be so difficult?  I didn't.  It took a long time for us to figure out what we wanted, so we toured around some neighbourhoods to look at color schemes on other homes.  We knew we wanted a classic look, and for us building our first home we thought it would be safe. 

Here is a picture of our color scheme inspiration:


Based on the above photo, we chose Pratt & Lambert Diplomat Grey for the stucco,


Pratt and Lambert Swiss Coffee for the trim, (the photo is a bit light, but you get the idea)


And finally the stone, which I just love, is called Milwaukee Limestone.  It's the exact stone as shown in the photo above.  It took some time to find out what it was, but I can be really resourceful when I want to be :-)

Have a wonderful day!

Monday 20 June 2011

Yummy Blueberry Scones

I made this delicious scones on Sunday morning. I found the recipe in the May 2011 edition of House & Home magazine featuring an article on Bobbette & Belle, a patisserie in Ontario.   These were super simple to make and turned out exactly like they looked in picture below. Happy Baking!

Ingredients
· 2 cups all-purpose flour
· ¼ cup sugar
· ½ tsp baking soda
· ¼ tsp salt
· ½ cup cold, unsalted butter, cut into small pieces
· ¾ cup buttermilk
· 1 tsp pure vanilla extra
· Frozen blueberries to taste
· Icing sugar (optional)

Directions
1. Preheat oven to 375F and place rack in middle of oven. 
2. In a large bowl, whisk together flour, sugar, baking soda and salt. Add butter using a pastry blender to pressing with a fork until it forms a coarse, crumbly texture. Add buttermilk and vanilla; stir until dough forms. Do not overmix. 
3. Portion dough into 6 to 8 equal parts. Add blueberries while forming a thick disc with each portion. Do not overhandle once blueberries have been added.
4. Place on baking sheet with parchment paper and bake for 20-25 minutes or until golden and a toothpick inserted comes out clean. Remove from sheet and transfer to wire rack to cool.
5. Dust with icing sugar once cooled.

Friday 17 June 2011

Client Bungalow - Project Update

Made a little progress yesterday with my clients home.  The Restoration Hardware salvaged wood Trestle Table has arrived along with Natural Linen Parsons Chairs and they look amazing.  

Here is a quick pic.  Excuse the mess this is still a work in progress :-) 


While in Restoration Hardware to pick up a chandelier we had chosen, my client saw this guy hanging from the ceiling and had to have it.  It's now on order.


Next we needed to make a decision on the Fireplace surround and have decided on this lovely brick mosaic by Artistic Tile.  I think it's gorgeous and can't wait to see it installed!


Have a great weekend, and let's hope the sun comes out later so we can all enjoy a little patio time!

Kim

Wednesday 15 June 2011

Transom Love

Now that our final home plans are approved, I'm starting to think about some of the interior design.  One of the things I want to do in the bungalow is separate the living room from the kitchen/nook area but still keep in relatively open. 

After doing some research, I have fallen in love with the Transom.  Here are a few pics to give you an idea.

via Southern Living

 via General Splendour

 via Velvet & Linen

 via NKD Wood

That's done, now onto the million other areas of the home! 

Monday 13 June 2011

My New Favorite Song & Artist

The song is called "Anchor" by Mindy Gledhill. I love her pure voice. Enjoy!

Friday 10 June 2011

Bright & Summery Bedding

Have you been thinking about updating your bedroom or a guest bedroom for summer?  Well here are a few bright, cheery, and fresh looking bedding choices I think are just fabulous:

Love the graphic print and the orange mixed with the spring green headboard. Bedding is called "Trellis" by Trina Turk.

"Ikat" bedding by Jane Wilner.  Again, that pop of green is sooo fresh!


Just plain pretty... "Mirabella" bedding by Lulu DK for Matouk.  All of the above can be purchased at Horchow.com. 

Have a great weekend everyone...

Kim

Thursday 9 June 2011

Client Bungalow - Project Update


In the fall, my client decided to gut his 1200 square foot bungalow and renovate.  The new floor plan is more open, has a few more windows, and the kitchen area has been expanded and is now open to the dining area. 

All the walls in the home have been painted Shadow Beige by Pratt and Lambert, and the trim color is Balsa, also by Pratt and Lambert.  The color gives a warm and slightly aged feel to the home, which is what my client wanted.  

Here we are today.  The kitchen cabinets are installed and we are waiting for the countertops and a few other appliances and finishes.  

Here is the kitchen before…


Here is where were at today….

I will post more pictures at a later date as things are completed. 

Have a great day!
Kim

Wednesday 8 June 2011

Building our Bungalow – Floor plan & Elevation

Well, we finally got the stamp of approval from the Design Review Committee to proceed with the final working drawings of our new home.  We started the process a little over a year ago.  While a year seems like a long time to get a floor plan put together and the exterior elevations completed, I highly recommend not rushing the process.  Here are a few tips I learned along the way:

  • Each visit to the architect means $$ leaving your wallet, so….

  • Before you go see your architect and say “draw me a house”, think about the rooms that you want/need to have and the square footage you desire.  If you like the size of the rooms you have in your current home, measure them, or, if you would like them bigger, how much bigger?  Bring as much information as possible as well as inspirational photos from home and decorating magazines, other floor plans you’ve picked up along the way, or pictures from the internet.

  • Once you get your first set of drawings, it’s very unlikely that it will be exactly what you want. Take them home and look at them very closely for a week or two before you go back with changes.  We went through 13 minor design changes before we ended up with the final plan.

  • Do some space planning & furniture placement with your drawings. Typically architects will give you drawings that are ¼” in scale.  For example, if you are planning on using all the same furniture in your current living room, measure your pieces, then cut them out on graph paper (1 square = 1 foot).  Place the cut out pieces on your drawings and see if everything fits where you want it to.  If not, make a note to take back to your architect. 
Here is a 3D rendering of our elevation.  I will try and post the front view of it later.  Of course you have to picture it with landscaping and color!  Have a great day everyone!